Search results for: “sskaje”

  • Install DebugServer for iOS

    Extract DebugServer

    $ ls /Applications/Xcode.app/Contents/Developer/Platforms/iPhoneOS.platform/DeviceSupport/
    
    ...
    
    $ hdiutil mount /Applications/Xcode.app/Contents/Developer/Platforms/iPhoneOS.platform/DeviceSupport/15.5/DeveloperDiskImage.dmg
    正在检查“Whole_Disk”的校验和…
    ..................................................................................................................................................................................................................................................
                              Whole_Disk:已验证CRC32 $D034FA6C
    已验证CRC32 $8E250F8D
    /dev/disk4          	                               	/Volumes/DeveloperDiskImage
    
    $ cp /Volumes/DeveloperDiskImage/usr/bin/debugserver . 
    $ hdiutil unmount /Volumes/DeveloperDiskImage
    "/Volumes/DeveloperDiskImage" unmounted successfully.
    
    $ file debugserver 
    debugserver: Mach-O universal binary with 2 architectures: [arm64:Mach-O 64-bit executable arm64] [arm64e:Mach-O 64-bit executable arm64e]
    debugserver (for architecture arm64):	Mach-O 64-bit executable arm64
    debugserver (for architecture arm64e):	Mach-O 64-bit executable arm64e
    
    $ xcrun -sdk iphoneos lipo -thin arm64  debugserver -output debugserver_arm64
    

    Entitlements

    View

    codesign -d -v --entitlements - --xml debugserver_arm64 
    Executable=/Users/sskaje/Work/hiksemi/debugserver_arm64
    Identifier=com.apple.debugserver
    Format=Mach-O thin (arm64)
    CodeDirectory v=20400 size=5134 flags=0x2(adhoc) hashes=150+7 location=embedded
    Signature=adhoc
    Info.plist entries=5
    TeamIdentifier=not set
    Sealed Resources=none
    Internal requirements count=0 size=12
    <?xml version="1.0" encoding="UTF-8"?><!DOCTYPE plist PUBLIC "-//Apple//DTD PLIST 1.0//EN" "https://www.apple.com/DTDs/PropertyList-1.0.dtd"><plist version="1.0"><dict><key>seatbelt-profiles</key><array><string>debugserver</string></array><key>com.apple.private.cs.debugger</key><true/><key>com.apple.private.memorystatus</key><true/><key>com.apple.security.network.client</key><true/><key>com.apple.security.network.server</key><true/><key>com.apple.private.logging.diagnostic</key><true/><key>com.apple.backboardd.debugapplications</key><true/><key>com.apple.frontboard.debugapplications</key><true/><key>com.apple.backboardd.launchapplications</key><true/><key>com.apple.frontboard.launchapplications</key><true/><key>com.apple.springboard.debugapplications</key><true/></dict></plist>

    ent.xml

    <?xml version="1.0" encoding="UTF-8"?>
    <!DOCTYPE plist PUBLIC "-//Apple//DTD PLIST 1.0//EN" "https://www.apple.com/DTDs/PropertyList-1.0.dtd">
    <plist version="1.0">
    <dict>
    	<key>com.apple.private.cs.debugger</key><true/>
    	<key>com.apple.private.memorystatus</key><true/>
    	<key>com.apple.security.network.client</key><true/>
    	<key>com.apple.security.network.server</key><true/>
    	<key>com.apple.private.logging.diagnostic</key><true/>
    	<key>com.apple.backboardd.debugapplications</key><true/>
    	<key>com.apple.frontboard.debugapplications</key><true/>
    	<key>com.apple.backboardd.launchapplications</key><true/>
    	<key>com.apple.frontboard.launchapplications</key><true/>
    	<key>com.apple.springboard.debugapplications</key><true/>
    
    	<key>run-unsigned-code</key> <true/>
    	<key>get-task-allow</key> <true/>
    	<key>task_for_pid-allow</key> <true/>
    
    </dict>
    </plist>
    

    debugserver has entitlements

    	<key>seatbelt-profiles</key>
    	<array>
    	<string>debugserver</string>
    	</array>

    it causes

    iPhone:~ root# debugserver 192.168.11.40:12345 -waitfor HiStor 
    debugserver-@(#)PROGRAM:LLDB  PROJECT:lldb-1316.2.4.18
     for arm64.
    Waiting to attach to process HiStor...
    Listening to port 12345 for a connection from 192.168.11.40...
    Failed to get connection from a remote gdb process.
    Exiting.
    

    Replace Entitlements

    codesign -s - --entitlements ent.xml -f debugserver_arm64 
    debugserver_arm64: replacing existing signature

    Scp to server

    scp debugserver_arm64 root@192.168.11.11:~/

    If on palera1n

    cp debugserver_arm64 /var/jb/usr/bin/debugserver

    HiStor

    $ debugserver '*:12345' -waitfor HiStor

    lldb

    (lldb) platform select remote-ios
      Platform: remote-ios
     Connected: no
      SDK Path: "/Users/sskaje/Library/Developer/Xcode/iOS DeviceSupport/iPhone8,1 15.8.2 (19H384)"
     SDK Roots: [ 0] "/Users/sskaje/Library/Developer/Xcode/iOS DeviceSupport/iPhone8,1 15.8.2 (19H384)"
    (lldb) target create HiStor
    Current executable set to '/Users/sskaje/Work/hiksemi/ios/Payload/HiStor.app/HiStor' (arm64).
    (lldb) process connect connect://192.168.11.156:12345
    

    Useless note

    (lldb) memory read -f y -c 4 -s 1 $pc
    0x105280e98: 48 61 74 94
    (lldb) memory write  $pc f0 60 74 94 
    (lldb) memory read -f y -c 4 -s 1 $pc
    0x105280e98: f0 60 74 94
    

  • EdgeRouter 4 Install msd_lite / msd

    msd_lite

    http://www.netlab.linkpc.net/wiki/en:software:msd:lite

    Deprecated, but recommended!!! You can also use Multi Stream daemon (msd)

    Steps:

    1 Clone code on computer, because my ER-4 reports dpkg errors, due to the outdated debian stretch. Then upload to ER-4

    git clone --recursive https://github.com/rozhuk-im/msd_lite.git
    tar zcvf msd_lite.tar.gz msd_lite
    scp msd_lite.tar.gz ubnt@192.168.1.1:/tmp/

    2 On ER-4, install build-essential, cmake

    For build-essential, read EdgeRouter 4 Build & Install udpxy

    # apt install cmake
    Reading package lists... Done
    Building dependency tree       
    Reading state information... Done
    You might want to run 'apt --fix-broken install' to correct these.
    The following packages have unmet dependencies:
     cmake : Depends: cmake-data (= 3.7.2-1) but it is not going to be installed
             Depends: libarchive13 (>= 3.0.4) but it is not going to be installed
             Depends: libjsoncpp1 (>= 1.7.4) but it is not going to be installed
             Depends: libuv1 (>= 1.4.2) but it is not going to be installed
     dpkg-dev : Depends: xz-utils but it is not going to be installed
    E: Unmet dependencies. Try 'apt --fix-broken install' with no packages (or specify a solution).


    # apt install cmake cmake-data  libarchive13 libjsoncpp1 libuv1 

    3 build on ER-4

    tar xvf /tmp/msd_lite.tar.gz
    cd msd_lite
    mkdir build
    cd build
    cmake ..
    make 
    make install

    4 configure and run

    /etc/msd_lite.conf

    
    <?xml version="1.0" encoding="utf-8"?>
    
    <!--
     Sizes in kb, time in seconds
    -->
    
    <!--
    <skt> <rcvLoWatermark>XXXX</rcvLoWatermark> - DOES NOT WORK on Linux!
    man socket(7):
    ...
    The select(2) and poll(2) system calls currently do not respect the SO_RCVLOWAT
    setting on Linux, and mark a socket readable when even a single byte of data is
    available.
    ...
    -->
    
    
    <msd>
    	<log>
    		<file>/var/log/msd_lite.log</file>
    	</log>
    
    	<threadPool>
    		<threadsCountMax>1</threadsCountMax> <!-- 0 = auto -->
    		<fBindToCPU>yes</fBindToCPU> <!-- Bind threads to CPUs. -->
    		<fCacheGetTimeSyscall>yes</fCacheGetTimeSyscall> <!-- Cache gettime() syscalls.. -->
    		<timerGranularity>100</timerGranularity> <!-- 1/1000 sec -->
    	</threadPool>
    
    
    <!-- HTTP server -->
    	<HTTP>
    		<bindList>
    			<bind><address>0.0.0.0:7088</address><fAcceptFilter>y</fAcceptFilter></bind>
    			<bind><address>[::]:7088</address></bind>
    		</bindList>
    
    		<hostnameList> <!-- Host names for all bindings. -->
    			<hostname>*</hostname>
    		</hostnameList>
    	</HTTP>
    
    
    	<hubProfileList> <!-- Stream hub profiles templates. -->
    		<hubProfile>
    			<fDropSlowClients>no</fDropSlowClients> <!-- Disconnect slow clients. -->
    			<fSocketHalfClosed>no</fSocketHalfClosed> <!-- Enable shutdown(SHUT_RD) for clients. -->
    			<fSocketTCPNoDelay>yes</fSocketTCPNoDelay> <!-- Enable TCP_NODELAY for clients. -->
    			<fSocketTCPNoPush>yes</fSocketTCPNoPush> <!-- Enable TCP_NOPUSH / TCP_CORK for clients. -->
    			<precache>4096</precache> <!-- Pre cache size. Can be overwritten by arg from user request. -->
    			<ringBufSize>1024</ringBufSize> <!-- Stream receive ring buffer size. Must be multiple of sndBlockSize. -->
    			<skt>
    				<sndBuf>512</sndBuf> <!-- Max send block size, apply to clients sockets only, must be > sndBlockSize. -->
    				<sndLoWatermark>64</sndLoWatermark>  <!-- Send block size. Must be multiple of 4. -->
    				<congestionControl>htcp</congestionControl> <!-- TCP_CONGESTION: this value replace/overwrite(!) all others cc settings: cc from http req args, http server settings, OS default -->
    			</skt>
    			<headersList> <!-- Custom HTTP headers (sended before stream). -->
    				<header>Pragma: no-cache</header>
    				<header>Content-Type: video/mpeg</header>
    				<header>ContentFeatures.DLNA.ORG: DLNA.ORG_OP=01;DLNA.ORG_CI=0;DLNA.ORG_FLAGS=01700000000000000000000000000000</header>
    				<header>TransferMode.DLNA.ORG: Streaming</header>
    			</headersList>
    		</hubProfile>
    	</hubProfileList>
    
    
    	<sourceProfileList> <!-- Stream source profiles templates. -->
    		<sourceProfile>
    			<skt>
    				<rcvBuf>512</rcvBuf> <!-- Multicast recv socket buf size. -->
    				<rcvLoWatermark>48</rcvLoWatermark> <!-- Actual cli_snd_block_min if polling is off. -->
    				<rcvTimeout>2</rcvTimeout> <!-- STATUS, Multicast recv timeout. -->
    			</skt>
    			<multicast> <!-- For: multicast-udp and multicast-udp-rtp. -->
    				<ifName>br0</ifName> <!-- For multicast receive. -->
    			</multicast>
    		</sourceProfile>
    	</sourceProfileList>
    </msd>


    I only modified the multicast -> ifName to br0.

    RUN

    msd_lite -c /etc/msd_lite.conf -v

    msd

    http://www.netlab.linkpc.net/wiki/software:msd:index

    Same as msd_lite, but powerful.

  • 北京联通猫棒 IPTV

    故事背景:家里拉了很多年的千兆,这两年才从 FTTB 换成 FTTH。但是之前买的千兆套餐不送 IPTV 了,而光改的时候,联通的工作人员帮我改了桥接,但是所有口都绑定了 Internet。现在开通IPTV需要初装费,还要月费,所以我就没开通。本来是不想折腾的,因为实在没空,但是被催了好久猫棒的事情,所以就临时下了个单,花了一天做了些实验。

    (more…)
  • EdgeRouter 4 Build & Install udpxy

    Please DON’T use udpxy, check msd_lite!!!

    Source Code: http://gigapxy.com/download/udpxy/

    # show version
    Version:      v2.0.9-hotfix.7
    Build ID:     5622762
    Build on:     06/15/23 11:31
    Copyright:    2012-2020 Ubiquiti Networks, Inc.
    ...

    Steps:

    1 Configure apt source

    EdgeOS 2.0 is based on debian stretch, outdated.

    # cat /etc/apt/sources.list.d/stretch.list
    deb http://archive.debian.org/debian/ stretch main contrib
    deb http://archive.debian.org/debian/ stretch-updates main contrib
    deb http://archive.debian.org/debian/ stretch-backports main contrib
    
    deb http://archive.debian.org/debian-security/ stretch/updates main

    2 install build-essential

    apt install build-essential

    3 Get source, and build

    wget http://gigapxy.com/download/udpxy/udpxy-src.tar.gz
    tar xvf udpxy-src.tar.gz
    cd udpxy-1.0.25-1/
    make

    Then you will see error like cc not found.

    CC=gcc make

    You’ll see

    gcc: error trying to exec 'as': execvp: No such file or directory

    This is because the binutils package provided by UBNT is almost empty.

    wget -c https://archive.debian.org/debian/pool/main/b/binutils/binutils_2.28-5_mips.deb
    dpkg --unpack binutils_2.28-5_mips.deb

    Backup your config, Install manually.

    Then

    CC=gcc make
    CC=gcc make install
  • Cloudflare Bulk Delete DNS Records

    DOMAIN=sskaje.me
    EMAIL=sskaje@mail.sskaje.me
    KEY=this.is.cloudflare.key
    
    
    ZONE_ID=$(curl -s -H "X-Auth-Email: ${EMAIL}" -H "X-Auth-Key: ${KEY}" "https://api.cloudflare.com/client/v4/zones" | jq -r '.result[] | select(.name == "'$DOMAIN'") | .id')
    
    
    for RECORD_ID in $(curl -s -H "X-Auth-Email: ${EMAIL}" -H "X-Auth-Key: ${KEY}" "https://api.cloudflare.com/client/v4/zones/${ZONE_ID}/dns_records"| jq -r '.result[] | select(.name | test("_acme-challenge"))  | .id'); do
    echo $ZONE_ID $RECORD_ID; 
    curl -s -H "X-Auth-Email: ${EMAIL}" -H "X-Auth-Key: ${KEY}" -XDELETE "https://api.cloudflare.com/client/v4/zones/${ZONE_ID}/dns_records/${RECORD_ID}";
    done
    
  • Windows 目录大小写敏感

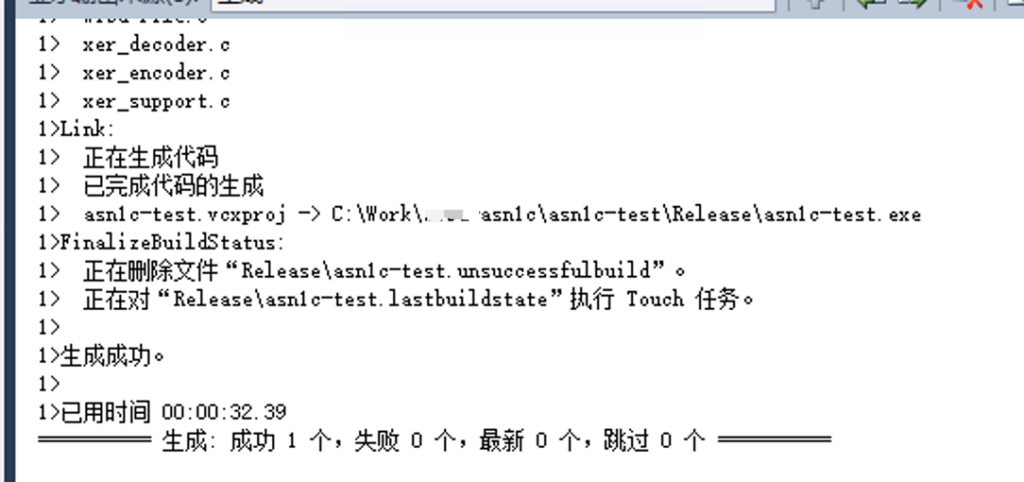
    用了一个古老的工具 asn1c,结果定义文件里有个 Time 类型,生成了 Time.h,而这个工具自己把所有文件放在一个目录里,不得不把源码目录放到include path里,于是祭出大法。。。

    fsutil file setCaseSensitiveInfo asn1c-test disable
    fsutil file setCaseSensitiveInfo asn1c-test enable

    结论,vs工程源码目录要单放,至少 vs2010 工程默认的设置里,有的地方用 Release 有的地方用 release。

  • WSL Docker 迁移 Volume 到 Linux

    看了一堆 Volume 迁移的教程,麻烦死。其实操作逻辑很简单,找到源主机的 docker volume 目录(一般在 /var/docker/volumes/ ),在目标端建立同名的volume,停掉两端的docker,从源把目录 rsync 到目标。

    Windows 11 + WSL2 + Docker。

    操作步骤如下

    1 找到 Docker 的数据盘 VHDX。

    我自己的磁盘被迁移到了 D盘,如果不知道在哪儿,一般在用户目录,例如 C:\Users\sskaje\AppData\Local\Docker,这个目录下 distro 是程序的镜像,data是数据的镜像。

    如果还不在这里,Windows 11 可以使用任务管理器 -> 性能 右上角… -> 资源监视器 -> CPU,在关联的句柄里搜索 vhdx,然后操作docker,例如 系统托盘退出docker 再打开,或者打开docker-desktop 的界面,乱点点。

    2 退出 Docker Desktop。

    3 在 WSL 里 手动加载 Docker Desktop 的数据盘。

    wsl.exe -d Debian --mount --vhd D:/WSL/Docker/data/ext4.vhdx --bare --name docker-data-1

    参考 https://www.sskaje.me/2023/08/13/wsl-mount-external-vhdx-disk/,找到 docker 数据盘可能的磁盘,我这里是 sdd,直接挂载。

    mkdir docker-data
    mount /dev/sdd docker-data/

    于是,在 docker-data/data/docker/volumes 里能找到正常 docker volumes 目录里的所有文件。

    cd docker-data/data/docker/volumes

    4 (新terminal窗口)在目标主机上建立对应的volumes,然后关掉 docker。

    以 gogs-data 为例,在目标主机上执行

    docker volume create gogs-data
    /etc/init.d/docker stop

    5 从源 WSL 里,rsync 目录

    rsync -av gogs-data root@192.168.11.11:/var/lib/docker/volumes/

    执行完成后,在目标主机上启动 docker

    /etc/init.d/docker start

    如果有多个volume要迁移,迁移完所有的volume之后再start。

    6 目标 Linux 启动对应的docker。

    例如我的 gogs

    docker run --detach --name=gogs -p 10022:22 -p 10880:3000 -v gogs-data:/data gogs/gogs

    再用浏览器访问 192.168.11.11:10880,用之前的凭据登录,一切正常。

    7 收拾残局。

    很遗憾,WSL 2 我不知道怎么正确地 unmount Disk ,我尝试 linux 里 umount 再从外边 wsl --unmount DISK,失败,只能用 wsl --unmount 卸载全部。

  • 使用 Proxmox VE 抓 USB 数据包

    试过 Windows + USBPcap,Windows + VirtualBox,Mac + VirtualBox,都各种问题。

    本来目标是监测一个设备的 usb 刷写过程,用笔记本电脑的方案里最靠近成功的是 Mac + VirtualBox,需要使用 root 启动 VirtualBox,相关命令如下

    /Applications/VirtualBox.app/Contents/MacOS/VBoxManage list usbhost
    sudo /Applications/VirtualBox.app/Contents/MacOS/VBoxManage controlvm "Win10-USB" usbattach "p=0xXXXX;v=0xXXXX;s=0x0006a003ecaab3f0;l=0x14200000" --capturefile /tmp/esXXXX.pcap

    其中Address 里的s=,或者 UUID 每次都不一样,导致刷写过程的 USB 断开之后,下一次就没法自动发现了。

    因为按VirtualBox 文档要求,需要手动 usbattach,所以还没办法用 USB filter 来自动操作。

    而,文档里介绍的抓 Root Hub 的方法,在我的 mac 上无效,而我试图 Windows + VirtualBox,崩。所以转过来看qemu 的方案。

    搜到了 qemu 的官方文档。

    https://qemu-project.gitlab.io/qemu/system/devices/usb.html

    All usb devices have support for recording the usb traffic. This can be enabled using the pcap=<file> property, for example:
    
    -device usb-mouse,pcap=mouse.pcap

    于是赶紧去看 Proxmox VE 的 USB 选项,配置之后,可以正常发现设备,虚拟机里的软件也能正常识别。

    ssh 到 pve 宿主机上,我的虚拟机 ID 102

    qm showcmd 102

    去掉 USB 再来一次,对比了一下命令参数,和 pve 的文档一致 https://pve.proxmox.com/wiki/USB_Devices_in_Virtual_Machines

    操作方式是 qm monitor,web ui里去掉usb设备,手动添加,把showcmd 里拿到的设备参数处理一下,命令如下

    root@pve:~# qm monitor 102 
    Entering QEMU Monitor for VM 102 - type 'help' for help
    qm> device_add qemu-xhci,p2=15,p3=15,id=xhci,bus=pci.1,addr=0x1b
    qm> device_add usb-host,bus=xhci.0,port=1,vendorid=0xXXXX,productid=0xXXXX,id=usb0,pcap=/tmp/esXXXX.pcap
    qm> quit
    

    其中,VID 和 PID 我替换成 XXXX了,根据自己实际情况来。

    然后,把 pcap 拿回来,Wireshark 打开,分析。

    但是,数据包没抓全。

    Frame 114: 8267 bytes on wire (66136 bits), 320 bytes captured (2560 bits)

    调查了一下,

    https://github.com/qemu/qemu/blob/master/hw/usb/pcap.c#L73

    https://github.com/qemu/qemu/blob/master/hw/usb/pcap.c#L185

    源码这两处定义了最大数据长度 256,正好和拿下里的pcap文件里的一致。

    就这样吧,等有需求的时候,再build一个qemu自己抓完整包,就是不知道性能风险有多大。

    另外一个可能的方案:https://fedoraproject.org/wiki/Usbmon

    结束。

  • iOS DNS Tunnel

    一直想留个 dns tunnel 的实例给手机用,以便不时之需。最近发现有个特殊场景,需要用到 dns tunnel。

    很多年前调研的时候,选定了 iodine,但是客户端是个问题,windows的程序古早,而且需要 openvpn 古早版本的 tuntap 驱动,iOS之前一直没有找到合适的客户端,拿电脑开热点有点过于傻(虽然我还是买了个 Connectify并用过几次),带个 OpenWRT 的路由(gl-inet)配充电宝好像是可以但是也挺麻烦。

    其他方案也看过,dns2tcp 算是接受度很高的方案,但是没找到 iOS 的客户端。

    Github 上有个 iOS 版的开源项目,不想折腾。

    最近又发现一个上架了的开源项目,Purple Haze,使用的方案是基于 iodine 的,省事了。

    服务器,iodined

    iodined -f -c -P password -DD -l 1.2.3.4 -m 1120 172.16.55.1 24 dns.sskaje.me

    MTU是个大问题,如果不指定,客户端每次建立连接都要去试。大概观察了一下客户端的日志,选了个小的 1120,客户端也得同步设置。

    NAT是需要开启的。eth0是公网的出口设备。

    iptables -t nat -A POSTROUTING -s 172.16.55.0/24 -o eth0 -j MASQUERADE

    实测,速度大概比 56k 猫的速度快一点,图片什么的基本看不到了,而且丢包率可观。

    再,如果iodined的服务器有其他网络,需要指定出口,例如:

    流量按本机的路由表转给其他二层设备,直接添加路由,并根据需求在出口设备上加 NAT。

    流量转给一个 point-to-point 设备,例如 wireguard、sit tunnel,OpenVPN TUN等,或者 OpenVPN TAP 类似的 二层设备

    例如,全部流量转给 wireguard wg0,table 33

    ip route add 172.16.55.0/24 dev dns0 table 33 
    ip rule add from 172.16.55.0/24 table 33
    ip route add default dev wg0 table 33 
    iptables -t nat -A POSTROUTING -s 172.16.55.0/24 -o wg0 -j MASQUERADE

  • WordPress Extra Authentication

    Nginx snippets adding extra basic auth to wordpress.

        location ~ ^/(xmlrpc|wp-.+)/?.*\.php$ {
            auth_basic "hahaha";
            auth_basic_user_file "/etc/nginx/sskaje.auth";
    
            fastcgi_split_path_info ^(.+\.php)(/.+)$;
            fastcgi_pass unix:/run/php/php-fpm.sock;
            fastcgi_index index.php;
            include fastcgi.conf;
    
            fastcgi_intercept_errors on;
        }
    

    Create Password File

    htpasswd -c /etc/nginx/sskaje.auth sskaje

    Add User

    htpasswd /etc/nginx/sskaje.auth sskaje